


Installing VPN on Kali Linux 2016
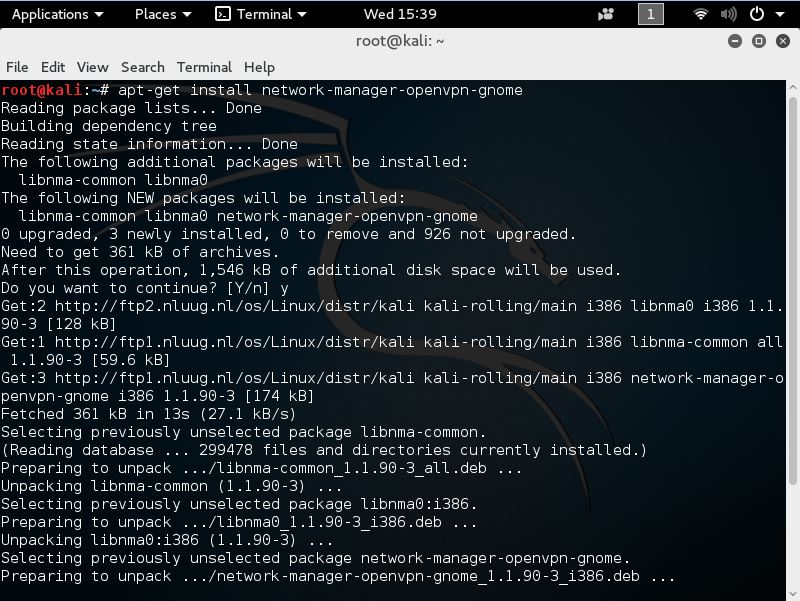
By default the the network settings do not offer an option to set a VPN connection. The first step is to add the OpenVPN option to the network settings menu. For this purpose we need to install OpenVPN in order to be able to add a new VPN connection in the network settings. Let’s start installing VPN on Kali Linux 2016 by using the following command on a new terminal session:
apt-get install network-manager-openvpn-gnome
This command will install the OpenVPN network manager and the additional packages which are needed to have it function properly. The network-manager-openvpn-gnome package only installs the OpenVPN protocol, this is sufficient in most of the cases and certainly if you’re using the Golden Frog VPN service. If you want to install other VPN protocols like PTTP or L2TP, you can use the following command that will install all of them:
apt-get install network-manager-openvpn network-manager-openvpn-gnome network-manager-pptp network-manager-pptp-gnome network-manager-strongswan network-manager-vpnc network-manager-vpnc-gnome

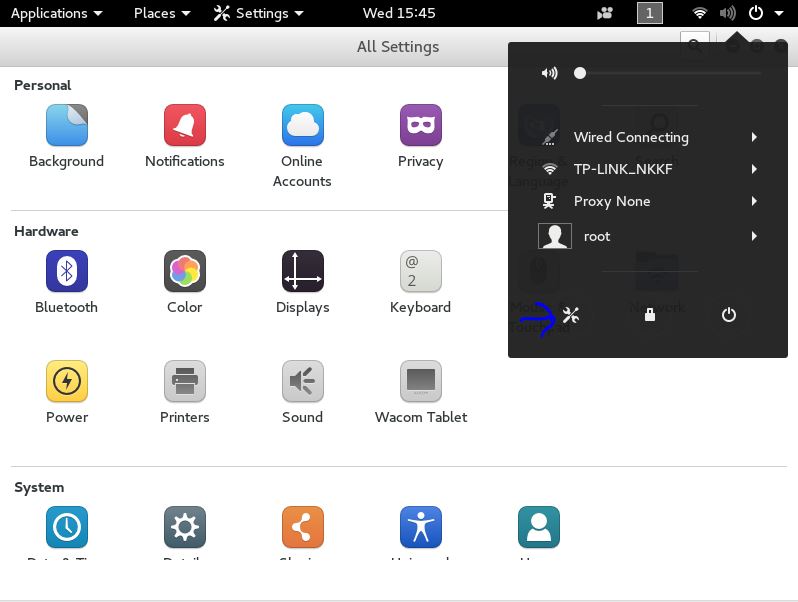
When the installation of all packages has been finished we can continue with the following step: Add a new VPN connection and configure the VPN connection settings. Let’s start with adding a new VPN connection in the network settings by navigating to the settings menu:

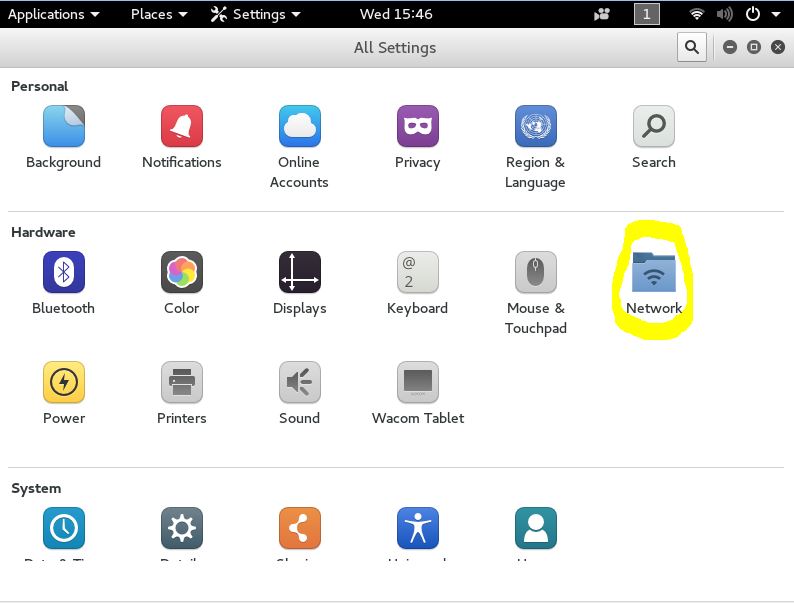
And open the Network settings panel by using the following button:

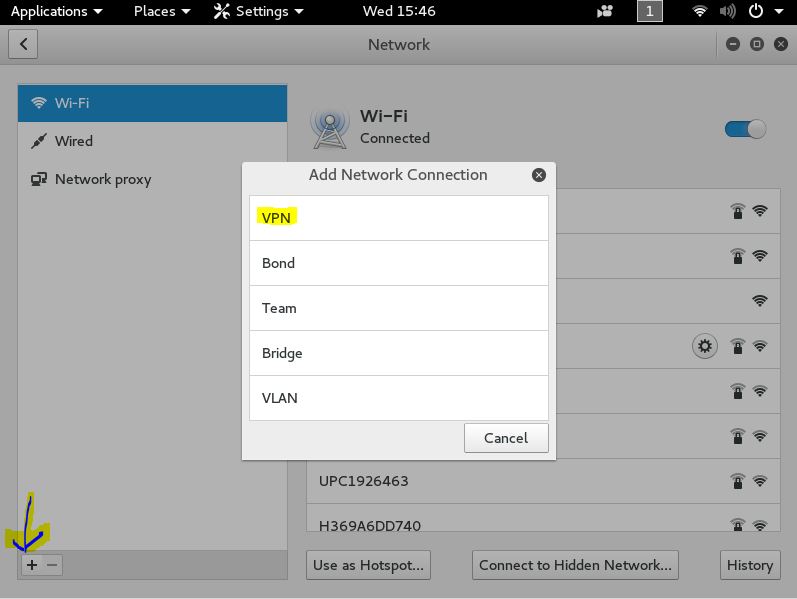
Now click the + sign in the bottom left corner to add a new connection and click “VPN” in the add network connection menu:

And finally add a new OpenVPN Connection:

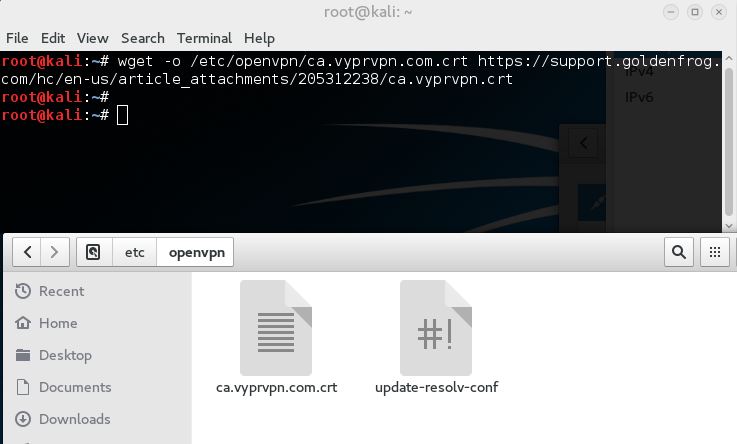
This will take us to the menu where we can define the VPN server settings to set up a connection. In this step we need to define the gateway, login credentials and a VyprVPN Certificate Authority (CA) certificate. Let’s download the certificate first by using the following command:
wget -O /etc/openvpn/ca.vyprvpn.com.crt
https://support.goldenfrog.com/hc/en-us/article_attachments/205312238/ca.vyprvpn.com.crt
You can also download the certificate file manually using the following link:
Make sure that you save the certificate file to the following location:
/etc/openvpn/

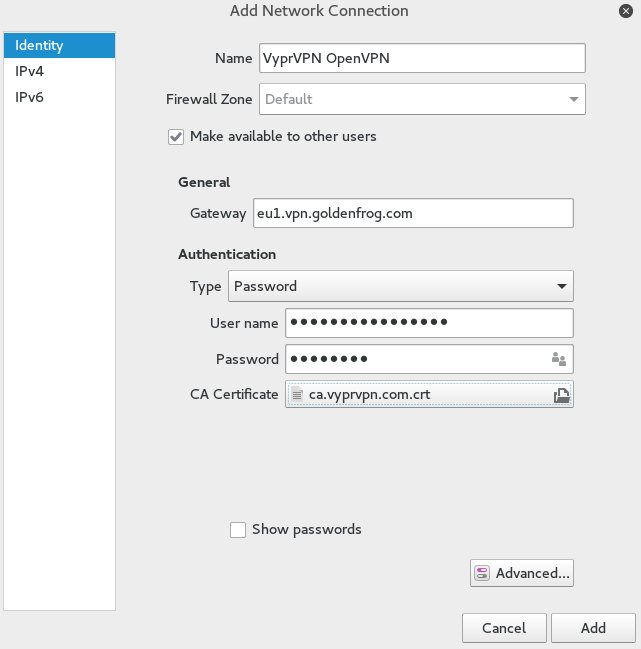
Now we need to specify the gateway and some other settings:
- Name: VyprVPN OpenVPN
- Make available to other users when applicable
- Gateway: VPN server gateway, pick any of these servers from Golden Frog.
- User name: The e-mail address used during registration at Golden Frog
- Password: The password from your VyprVPN account
- CA Certificate: Select the downloaded CA certificate from the following directory: /etc/openvpn/
After entering all the required settings the form should look like this:

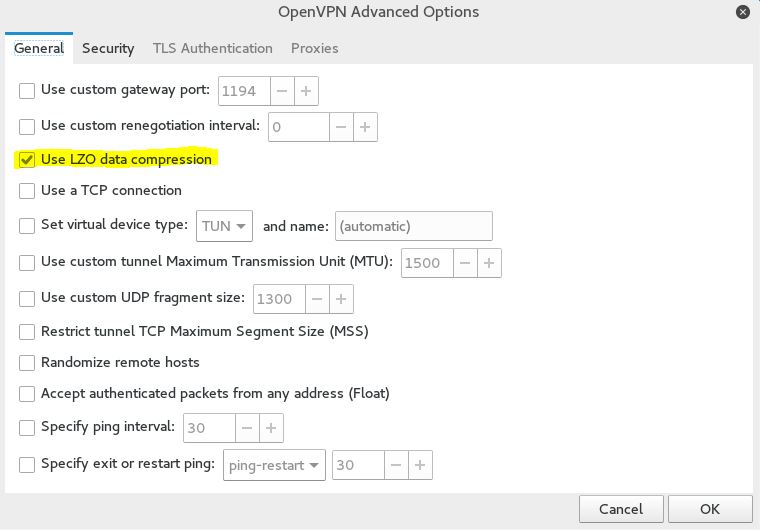
The last step in the setup process is to enable LZO compression in the advanced menu. You can do this by clicking the advanced button in the bottom right corner of the screen and enable LZO compression.

Now close the advanced options menu and apply the changes to the new VPN connection and let’s see if it is working by levering the blue switch in the top right corner of the VPN connection screen to activate the VPN connection:


Installing VPN on Kali Linux 2016 Rolling
35
Last year we already did a tutorial on how to install VPN on Kali Linux. Since then a lot has changed and the installation procedure is a little different now. This resulted in a lot of questions by our readers through comments on this website and social media. In this tutorial we will be installing VPN on Kali Linux 2016 rolling edition using OpenVPN and also the VPN service from Golden Frog again as we did in the last tutorial. Of course you can use any VPN provider you like, including free VPN services, since the installation procedure will be practically the same for any provider. If you do not have a VPN provider yet you might as well take advantage of one of the following offers from Golden Frog:
If you sign up using one of the following links you can get a 50% discount:

Or the following offer with 25% off for annual accounts:

Why do I use VyprVPN from Golden Frog?
- 700+ servers worldwide on 50+ locations and free unlimited switching.
- VyprVPN apps for all common platforms for easy server switching.
- Unlimited speed and data usage.
- Golden Frog owns all servers, no 3rd parties.
Installing VPN on Kali Linux 2016
By default the the network settings do not offer an option to set a VPN connection. The first step is to add the OpenVPN option to the network settings menu. For this purpose we need to install OpenVPN in order to be able to add a new VPN connection in the network settings. Let’s start installing VPN on Kali Linux 2016 by using the following command on a new terminal session:
apt-get install network-manager-openvpn-gnome
This command will install the OpenVPN network manager and the additional packages which are needed to have it function properly. The network-manager-openvpn-gnome package only installs the OpenVPN protocol, this is sufficient in most of the cases and certainly if you’re using the Golden Frog VPN service. If you want to install other VPN protocols like PTTP or L2TP, you can use the following command that will install all of them:
apt-get install network-manager-openvpn network-manager-openvpn-gnome network-manager-pptp network-manager-pptp-gnome network-manager-strongswan network-manager-vpnc network-manager-vpnc-gnome
When the installation of all packages has been finished we can continue with the following step: Add a new VPN connection and configure the VPN connection settings. Let’s start with adding a new VPN connection in the network settings by navigating to the settings menu:
And open the Network settings panel by using the following button:
Now click the + sign in the bottom left corner to add a new connection and click “VPN” in the add network connection menu:
And finally add a new OpenVPN Connection:

This will take us to the menu where we can define the VPN server settings to set up a connection. In this step we need to define the gateway, login credentials and a VyprVPN Certificate Authority (CA) certificate. Let’s download the certificate first by using the following command:
wget -O /etc/openvpn/ca.vyprvpn.com.crt
https://support.goldenfrog.com/hc/en-us/article_attachments/205312238/ca.vyprvpn.com.crt
You can also download the certificate file manually using the following link:
Make sure that you save the certificate file to the following location:
/etc/openvpn/
Now we need to specify the gateway and some other settings:
- Name: VyprVPN OpenVPN
- Make available to other users when applicable
- Gateway: VPN server gateway, pick any of these servers from Golden Frog.
- User name: The e-mail address used during registration at Golden Frog
- Password: The password from your VyprVPN account
- CA Certificate: Select the downloaded CA certificate from the following directory: /etc/openvpn/
After entering all the required settings the form should look like this:
The last step in the setup process is to enable LZO compression in the advanced menu. You can do this by clicking the advanced button in the bottom right corner of the screen and enable LZO compression.
Now close the advanced options menu and apply the changes to the new VPN connection and let’s see if it is working by levering the blue switch in the top right corner of the VPN connection screen to activate the VPN connection:
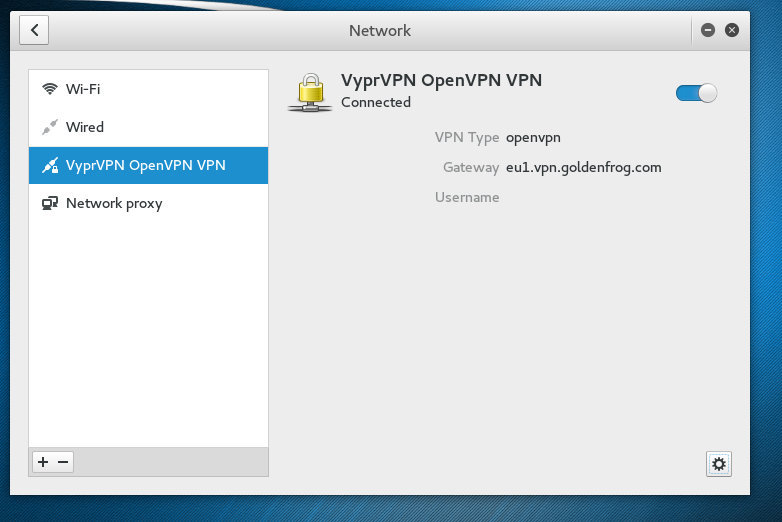
If all settings are valid you should be able to setup a VPN connection successfully. If any errors occur you will be notified with a message looking like: Activation of network connection failed. If this error message occurs you have to check the logs using the following command in the terminal:
journalctl -n100
This will open the last 100 lines of the log. Any errors in the log will be marked red and should clear things up why the error occurred. In the following instance there was a problem with the downloaded certificate, which was solved by downloading the certificate again but manually this time using a browser.

If you have any questions regarding installing VPN on Kali Linux 2016 please use the comment function at the bottom of this page. Thanks for reading again on Namia Team


Aucun commentaire:
Enregistrer un commentaire